http://mattholden27.wix.com/evaluationquestion4
This task helped me understand and summarise all of the online tools, technologies, and softwares that I have used throughout the course. By using these technologies I have learnt a lot about presenting work, and how both online and offline programmes work.
Wednesday, 28 January 2015

Friday, 23 January 2015
Evaluation Question 3
This task has helped me understand what the audience and other people think of my music video. This is the essential feedback that is needed for any media product, and can help to improve, verify or change any parts of my final piece. Overall, this is something that all directors do and will help to see if my task is successful or not.
Evaluation Question 2
From doing this task, I have a bigger understanding of what I have been doing and what I have learnt. This includes my development from my digipak to my music video, and in what ways they have changed and they haven't. This means that I can clearly see how my editing, creative and camera styles have changed over the period of the course.
Tuesday, 13 January 2015
Evaluation Question 1
In what ways does your media product use, develop or challenge forms and conventions of real media products?
By doing this task, I have increased my own understanding and added clarity to my project as a whole. This is because I have gone through my video detailing and explaining it to the audience. As this is just the first cut for the video, this task will really help me when it comes to editing and creating my second cut, enabling me to emphasise certain points that I don't think were clear enough, and tone down on others that aren't too important. Overall, this task has not only helped me and the audience understand the whole project a lot more, but also it will make future cuts and editing simpler.
Saturday, 10 January 2015
Final Cut
This is the final edit of my music video. A few final cuts and edits have been made, but there is not too much difference to the second rough cut. Overall it is a lot smoother and looks more professional. I am very happy with how my final product came out and think it is a good representation of how successful my products can be.
Friday, 2 January 2015
Rough Cut #2
This is the second cut for my music video. This cut is near completion. There are some minor synching issues with the performance sections, however the narrative is complete. The only adjustments to the video will be synching the vocals and maybe slightly adjusting the length/position of the narrative clips. Overall, this is a very near complete video, and our final product will pretty much look like this.
Sunday, 28 December 2014
Issues With Guitar Synching
During the filming for the performance, we ran into some issues with the guitar synching. Our main actor who was also lip synching in the video and being our artist couldn't play the guitar, and it looked very unprofessional. We got around this by using another friend who could play the song. We carefully recorded him playing the song, so that you couldn't see it wasn't our original artist and then synched it perfectly with the song. This ended up really well, with the synching then being perfect and the whole project looking more professional.
Saturday, 27 December 2014
Editing Process

This is a screenshot from early on in the editing process. At this point, I was inserting the initial clips into the timeline to start working on the narrative.

This shows a jump cut being added to speed up the pace of the video and as a result, make it more interesting for the viewer.
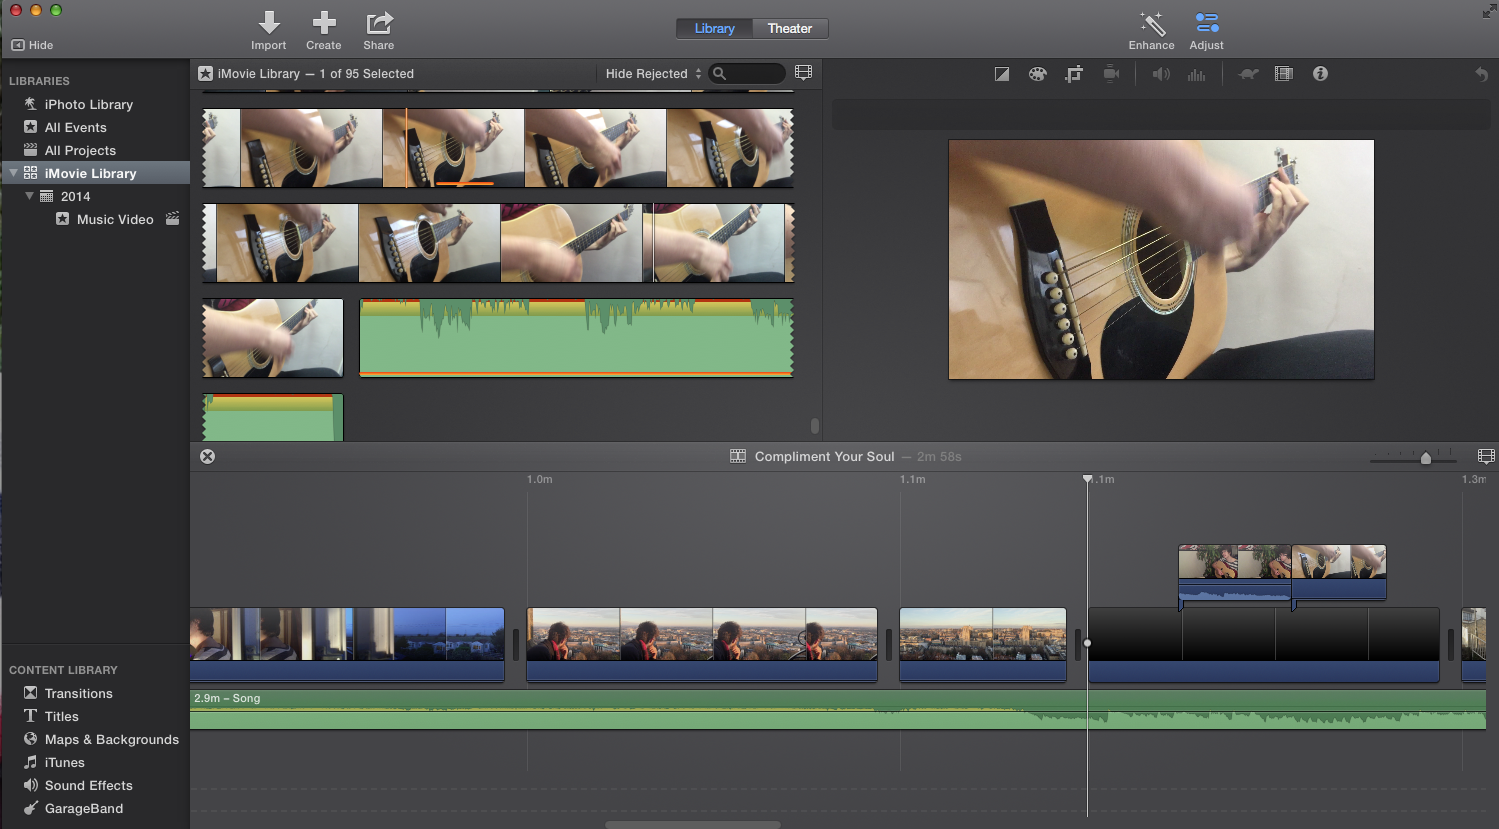
This shows a jump cut being added to speed up the pace of the video and as a result, make it more interesting for the viewer.

This screenshot shows the title being added at the start of the video.
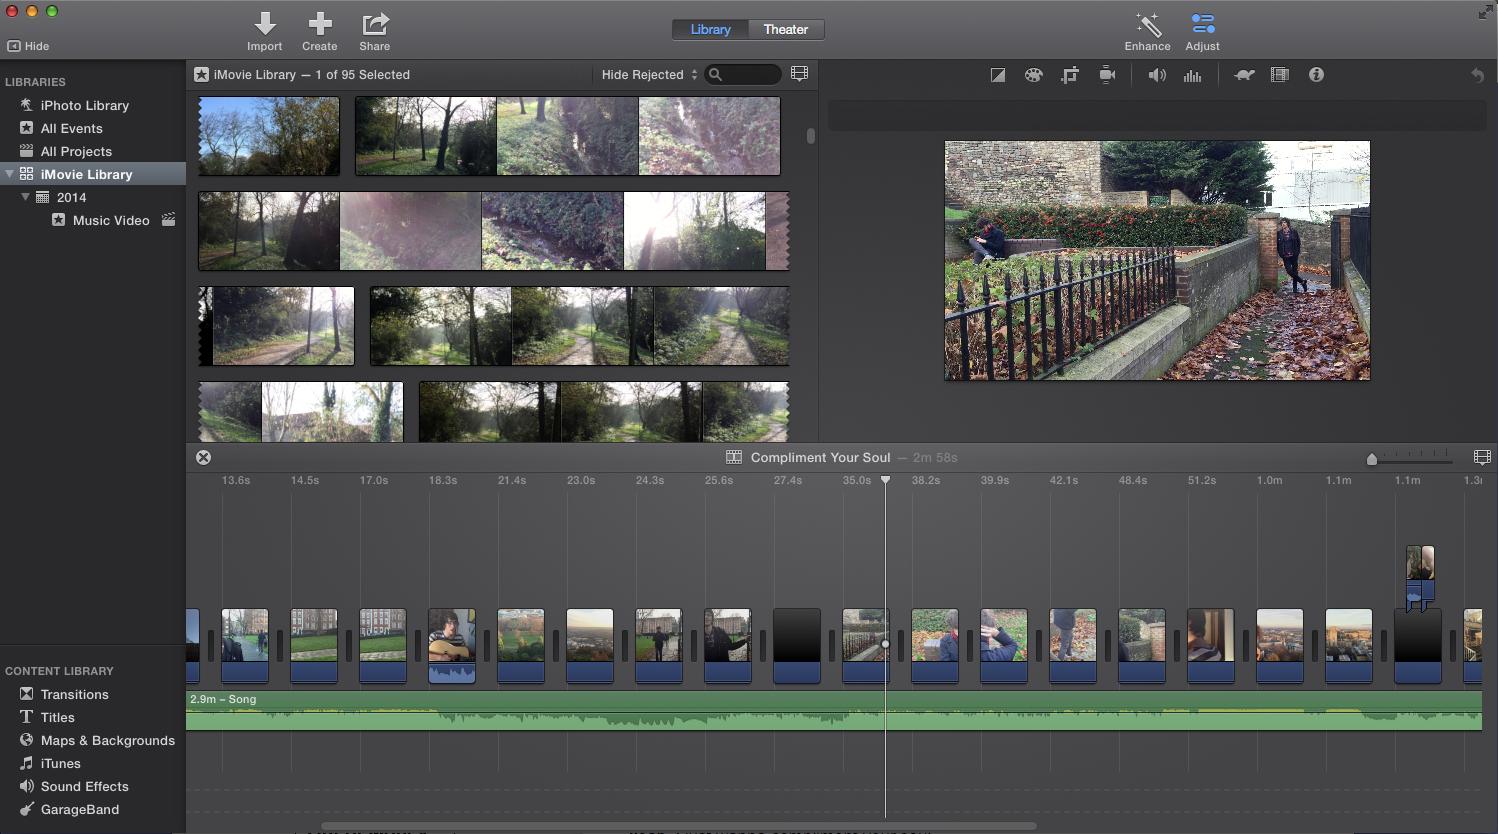
This shows the project timeline further into the production process.
You can see editing features such as clips overlapping and also quick cuts.
This task was essential for my video. Editing is a huge part of the process of making the video, and it has taught me loads about how to use iMovie and video editing software in general. I now know how to add, remove, trim and tweak clips, as well as compile all of the shots from filming into one film. This, behind filming, is the most important part of making my music video, and I feel I have learnt, experimented and succeed in my editing.
Thursday, 25 December 2014
Rough Cut #1
This is the first cut for my music video. At this point, some of the performance is very out of synch, and some of it isn't placed in yet. A large section of the narrative is placed in, however they are not necessarily the correct length or in the exact right position. At the moment this is just placing the clips generally where they will go, and a lot of future changes will happen. The first third of the video is very near completion but the last third is far off it. Overall this is a very mismatch cut, but gives me the basic outline for the structure to my video.
Tuesday, 16 December 2014
Completed Digipak and Digipak Poster


This is the final design for my digipak and the digipak poster. I am really happy with how this came out, as I believe that it will appeal to the target audience and sticks the the themes of the genre and type of artist I am trying to represent.
Digipak Contents (CD and Inside Cover) Construction

For the CD I used the cut out tool as heavily as I could. This makes the face unrecognisable however I really like the ffect it has. I feel that the image sticks and fits nicely with all the other themes of the digipak that I have already matched the other areas with.

The CD fits in well with the rest of the digipak and I am happy with how the whole thing is looking at this stage.

The inside cover is something that I am very proud of. Instead of showing one image, or multiple with the same level of decay, or edge simplicity and fidelity, there are four copies of the same image, but each more decayed than the next. This shows a progression or transition of the artist, and with the album names also showing a transition, this is another theme of the album.

After I finished the inside cover, the whole album was complete and I was very happy with how all the areas fitted nicely together. I believe that this final product will appeal to the target audience, and I also believe that I have learnt a lot about photoshop and computer editing techniques by completing this task.
Digipak Back Cover Construction

For the back cover, I used the cut out filter much more heavily. I Made it just recognisable as a mid shot, and used the album font for the song names on the back. This dark theme is continued throughout the digipak.

I decided to have 7 songs, all named in different and strange ways, as I believe this sticks well to the album name and theme of having different sides to a person, hens the different types of songs throughout the album.

This bcd cover fits nicely with the front cover, stem and poster. The very dark and cut out themes fit nicely with not only the strange genre but also the song and album names. From doing this I have learnt a lot about how naming things such as albums and songs can greatly change the representation to the audience.
Digipak Front Cover Construction

This is the design for my front cover of my digipak. Similar to the poster, I desaturated an image from my shoot with Cameron, our main actor, and used the cutout filter on photoshop. This once again gave it the reoccurring theme of eeriness and hows the artists "Dark Side" hence the album name.

I believe that I managed to successfully create a good digipak front cover, and this would be largely down to the planning and research I did at the start of the course. Creating this has taught me further about photoshop and what appeals to the audience.
Digipak Poster Construction

I started off the construction of my poster by using a photo shoot of Cameron I did. I used the cutout photoshop filter and desaturated the image to give it a really nice indie feel. I used four photos from the shoot that are noticeably different to give the impression of different sides to the artist, similar to the album name "Dark Side of Me" and that fits well to the indie genre.

This is the final design for the digipak poster. It has all the inessential information, yet doesn't overload the viewer with pointless info. I really like the black and white cold feel to it, I believe that this sticks well to the album name "Dark Side of Me" and appeals to the target audience of the indie/alternative genre.

From doing this task I have learnt more about how to use photoshop and what will catch the audiences eye. Using what I learnt from earlier on in the course I feel I managed to make this a very successful digipak poster.
Friday, 14 November 2014
Editing Task
From this task, I have learnt a lot about high level editing techniques such as transitions, jump cuts and sound effects. The video I made has helped this learning, while also helping me with knowing how to use iMovie effectively.
Friday, 7 November 2014


Wednesday, 29 October 2014


Tuesday, 21 October 2014
Task 22 - Storyboard
By doing this task, I now have a step by step guide of how my filming shall be done. This
Subscribe to:
Posts (Atom)